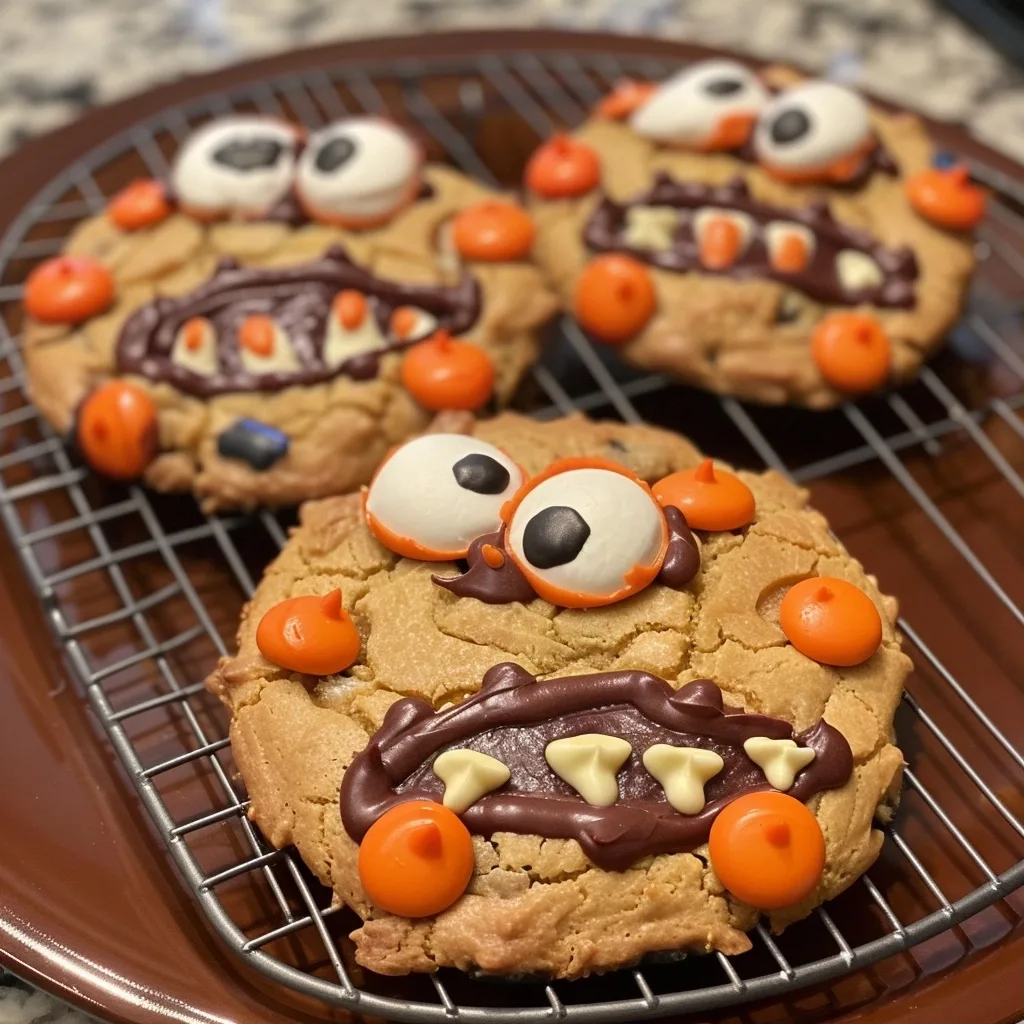
Halloween Monster Cookies for Spooky Celebrations deliver a festive, chewy, and colorful treat perfect for your holiday party guests. These loaded cookies feature a rich peanut butter base packed with oats, chocolate chips, and vibrant candy eyes. They provide a visually striking centerpiece that combines classic textures with a playful holiday aesthetic. Every bite offers a satisfying crunch from the candy additions paired with a soft, buttery cookie dough base.
| Prep Time | Cook Time | Total Time | Servings | Difficulty | Cuisine |
|---|---|---|---|---|---|
| 20 minutes | 12 minutes | 32 minutes | 24 cookies | Easy | American |
Why This Recipe Works
This recipe achieves the perfect balance of chewy edges and a soft center by incorporating a specific ratio of brown sugar to white sugar. The high moisture content from the peanut butter and oats prevents the cookies from becoming too crisp, ensuring they stay fresh for days.
Using a mix of fun, seasonal colors makes these treats stand out at any gathering. My experience shows that chilling the dough for just thirty minutes allows the flavors to meld and prevents excessive spreading in the oven. This creates a bakery-style aesthetic that impresses both children and adults alike.
Ingredients
| Ingredient | Quantity | Notes |
|---|---|---|
| Creamy Peanut Butter | 1 cup | Ensure it is shelf-stable, not natural style |
| Unsalted Butter | 1/2 cup | Must be softened to room temperature |
| Brown Sugar | 1 cup | Packed, provides moisture |
| Granulated Sugar | 1/2 cup | Helps with crisp edges |
| Eggs | 2 large | Room temperature preferred |
| Rolled Oats | 3 cups | Old-fashioned oats provide better texture |
| All-Purpose Flour | 1 cup | Measured by spooning into the cup |
| Chocolate Chips | 1 cup | Semi-sweet or dark work well |
| Candy Eyes | 1/2 cup | Add after baking for best results |
Step-by-Step Instructions
Preparing the Dough
- Cream the softened butter, peanut butter, brown sugar, and granulated sugar in a large mixing bowl until smooth.
- Add the eggs and vanilla extract to the mixture, beating thoroughly after each addition.
- Combine the flour, baking soda, and salt in a separate bowl before incorporating them into the wet mixture.
- Fold in the rolled oats and chocolate chips until evenly distributed throughout the dough.
Baking the Cookies
- Preheat your oven to 350 degrees Fahrenheit and line two large baking sheets with parchment paper.
- Scoop rounded tablespoons of dough onto the prepared baking sheets, spacing them at least two inches apart.
- Bake the cookies for ten to twelve minutes until the edges appear golden brown and set.
- Press candy eyes into the tops of the warm cookies immediately after removing them from the oven.
Chef Tips for Perfect Results
- Use room temperature ingredients to ensure the emulsion of fat and sugar stays stable.
- Measure flour by spooning it into the measuring cup rather than scooping directly from the bag.
- Do not overbake the cookies, as they continue to cook on the hot baking sheet for several minutes.
- Apply candy eyes while the surface is still soft to ensure they stick permanently as the cookie cools.
- Chill your dough before scooping to prevent the cookies from flattening too much during the baking process.
Common Mistakes to Avoid
- Mixing for too long leads to tough cookies; stop as soon as the flour disappears into the dough.
- Using natural peanut butter causes the dough to be oily and inconsistent, so always stick to commercial brands.
- Overcrowding the baking sheet inhibits air circulation, leading to uneven browning and soft, pale spots.
- Adding the candy eyes before baking will cause them to melt or burn, ruining the monster effect.
Variations and Substitutions
| Ingredient | Substitution | Impact on Flavor |
|---|---|---|
| Peanut Butter | Almond Butter | Adds a slightly nuttier, more refined flavor profile |
| Chocolate Chips | White Chocolate | Creates a sweeter, creamier contrast to the peanut butter |
| Oats | Quinoa Flakes | Provides a similar texture with slightly more protein |
Serving Suggestions and Pairings
Serve these monster cookies alongside warm apple cider or a glass of chilled milk for a classic pairing. They function perfectly as a dessert table staple at a Halloween-themed dinner party. Place them on a dark, textured platter to emphasize the spooky candy eyes and contrast the golden dough color.
Storage and Reheating
| Method | Duration | Instructions |
|---|---|---|
| Countertop | 5 days | Store in an airtight container at room temperature |
| Freezer | 3 months | Wrap individual cookies in plastic wrap before freezing |
Nutritional Information
| Nutrient | Amount per Serving |
|---|---|
| Calories | 180 kcal |
| Protein | 4g |
| Fat | 9g |
| Carbohydrates | 22g |
| Sugar | 12g |
Frequently Asked Questions
Can I make these cookies gluten-free?
Yes, you can substitute the all-purpose flour with a high-quality gluten-free flour blend. Ensure your oats are certified gluten-free to maintain the integrity of the recipe.
Why did my cookies spread too much?
The dough was likely too warm before hitting the oven. Chilling your scooped dough balls for thirty minutes prevents excessive spreading and ensures thicker cookies.
How can I tell when they are done?
The edges should appear golden brown while the centers look slightly soft and underdone. The residual heat from the baking sheet completes the cooking process after you pull them out.
Can I prepare the dough in advance?
Yes, you can prepare the dough and store it in the refrigerator for up to 48 hours. Bring the dough to near room temperature before scooping for the best results.
What is the best way to keep them soft?
Keep your cookies in an airtight container at room temperature with a slice of white bread. The bread provides moisture that the cookies absorb to maintain their soft, chewy texture.
Conclusion
Halloween Monster Cookies for Spooky Celebrations provide a reliable and fun way to embrace the festive spirit of the season. By following these precise steps and tips, you ensure a perfect batch every time you bake. These treats delight guests with their playful appearance and rich, peanut butter flavor profile. Gather your ingredients, prepare the dough, and enjoy the process of creating these memorable holiday snacks for your family. There is no better way to celebrate than with a batch of homemade, spooky cookies.